Sunday, December 30, 2012

Beaded cross and some earrings...

Yep, finally have made some earrings! I wouldn't have been myself though if I hadn't made some pendants too though. So in this entry you can see them both. Starting with the pendant anyway. ;)

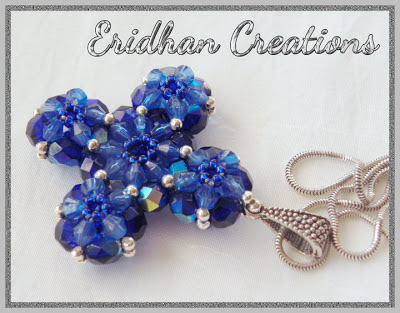
The pendant is made from 6mm fire polished beads, 4mm bicones, 2mm metal balls and size 11 seed beads. It is double sided  and it measures 4,5 cm (1,57") without the bail. Not a typical pattern for me though since its shape more or less resembles a cross, but a very nice pendant to wear anyway. ;)

beaded cross pendant

So the earrings I have made, at least one pair of them, is supposed to suit the pendant. It does, but only considering the colors, since they're made from exactly the same beads, but not when it comes to the shape. Oh well, I wouldn't wear both of them at the same time anyway. ;P The earrings measure 22mm (0.78") in diameter.

beaded earrings


And finally the second pair of earrings, quite tiny ones, since they measure only 18mm (0,70"), which match the pendant from here. Made, as the earrings from above, from 6mm and 4mm fire polished beads and some metal 2mm balls. These ones, in opposition to the first pair, look quite well while wearing with the pendant. That can make me wear them more often then. ;)

beaded earrings


And in the next entry - back to bead crocheting. ;)

Thursday, December 20, 2012

Beaded spheres

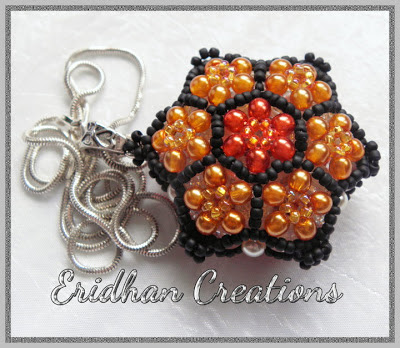
As I promised in the last entry, two beaded spheres, pendants of course (can it be any different? ;) ). The first one is made from 4mm wax pearls, 3mm fire polished beads in two colours, Toho round seed beads size 11 and 15 and it measures 2,5 cm (1") in diameter. The other one consists of 4mm pearls, 3mm metal balls, Czech seed beads size 10, Toho beads size 11 and 15, as well as 3 mm magatama beads. It is slightly bigger than the first one and measures 3cm (1,18") in diameter. Both spheres are empty inside, so they are very light. There's nothing more to write, time to show them then. ;)

The first one:

beaded ball pendant


And the second one:

beaded sphere


Now I think I should make some more earrings, since there are quite a few pendants that have been made as of late. So see you some other day with some earrings hopefully. ;)


Wednesday, December 19, 2012

Two pendants in one ;)

True, two pendants in one. Just because it is double sided and these sides differ a bit from each other. Sure, it is exactly the same pattern on both sides, only the colours of the beads are different, still it works fine as two pendants. It is made from 6mm crackle round beads, 4mm pearls, Czech seed beads and Toho seed beads. It measures 4,5 cm (1,57") in diameter without the bail. And it looks like a flower to me. ;)

So, this is one of the sides:

beaded pendant


And this is the other one:

beaded pendant


Also, there's one beaded crochet bracelet that has been made and photographed long time ago, but not shown on here yet. Nothing special really, a simple one, but I thought I needed something green for this post too, to fit the flowers. ;)

beaded crochet bracelet


Next time there will be some beaded spheres to see. So until then. :)


Tuesday, December 18, 2012

Roses are red...

They can be pink too, they can even be a beading pattern it looks like. ;)

So here's a beaded crochet rope, a thick one, 25 beads per row, with a rose pattern, and more than 6000 beads in total... You can see a necklace here, but there's a bracelet made with this pattern too... only somehow I can't force myself to make a clasp for it. ;P Hopefully I can make it soon. ;)

beaded crochet rope


The pattern for this necklace has been created by myself. So you are free to use it if you want. If you click on the picture below, you can download a dbb file with this pattern. The image file of the pattern is available here. So, enjoy. :)

crochet rope free pattern


Last time I promised some tatting too... So there's a tatting collar, a simple one, made from Anchor Arista thread, color #316. Something for the New Year's Eve, thanks to the glitter I think. ;)

tatting collar
 

And the last for today, a necklace that has been made some time ago, only I haven't shown it on here until now. Inspired by one or Weraph's lariat necklaces. I haven't copied her work though as I have used some different colours of the beads (except of the silver lined teal beads, that she has used for her project too) and added a clasp. Still her work was a great inspiration to me. I only hate the picture, it should have been better really! Oh well, despite that, still I can show it to you. ;)


Lots of work, since the necklace is 120cm (47") long, and I have worn it maybe two or three times... what a waste! ;)
 
Anyway, see you soon again. :)
 

Monday, December 17, 2012

A simple beaded pendant...

Very simple, double-sided beaded pendant made from fire polished beads (6mm and 4mm), that is 4cm (1,57") wide in diameter. Despite being double sided it is also quite flat - only 1,3cm (0,39"). Not a very complicated pattern though, yet it doesn't look bad hanging on a long chain... One of my favourite ones to wear recently - at least until I make another one that I'll like better I suppose. ;)

beaded pendant


Also, have made a few simple beaded balls recently that work as earrings for me now. A whole bunch of them really, so colorful that they look like candy. Yummy! ;)

beaded balls


Next time there will be some more crocheting... and tatting. So don't forget to check the blog again soon! ;)


Sunday, December 16, 2012

It's all about Preciosa!

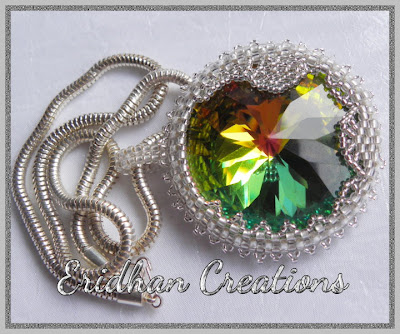
Yep, because those huge rivoli crystals are so beautiful! I can never have enough of them to bezel really. So there are two more of them that have been bezelled recently - something white, and something black, and I can't decide which one I like better. ;)

So, here's the white one, vitrail medium crystal:

rivoli pendant
 
rivoli pendant
 
 
And the black one, sahara crystal:

rivoli pendant

Both pendants measure around 5cm (1,97") in diameter. The bezels are made with Toho beads (size 11 and 15) as well as Preciosa bugle beads.


Just another donut pendant... and a little thief ;)

It's been a long time since the last entry... Well the illness doesn't really help me in updating this blog more often, it doesn't mean though that I don't do any beading at all. In fact I do lots of beading, since it is more or less the only thing that helps me to relax and doesn't make me too tired either... So, there's a few new things for you to see. :)

As the title says, another beaded donut has been made recently. In fact it is more or less exactly the same pattern as the one from here, only with some different beads - oval spectra beads 11x8 mm, and some different embellishment too. And they do make quite a difference, don't you think? ;)

beaded donut pendant


The other side of this pendant looks almost the same. But only almost. ;)

beaded donut pendant

The pendant measures 4,5 cm (1,57") in diameter.

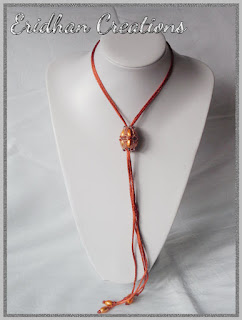
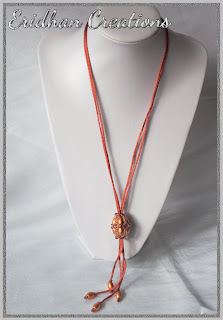
And since I got to like those beads quite much, I have used them for some other project too. A simple necklace with a core beaded bead, that can be slided up and down on the ropes, so it can be worn in a few different ways. It has been quite a challenge though to take a picture of it... It's all because a certain black devil has appeared out of nowhere...

beaded core bead


...and decided to steal it for herself. ;)

beaded core bead


The devil was generous enough though to allow me to take some more pictures before she had taken the necklace with her. Thank you, devil, for being so kind! ;)

So, this is how the necklace can be worn:

beaded necklacebeaded necklace


And the core bead (3,3cm long and 2,5cm wide) looks like this:

beaded core bead


And soon there will be another blog entry with some new beadwork for you to see. :)


Tuesday, November 13, 2012

Beaded donut - tutorial. Part 3

The last part of the tutorial! I'm sorry that you had to wait for one day longer though... I still hope you will enjoy it anyway. :)


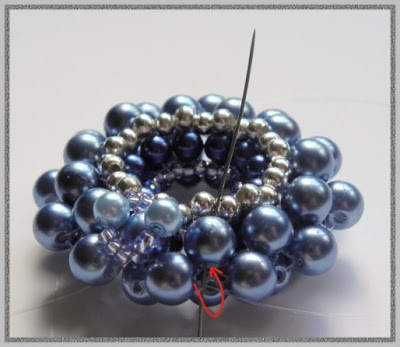
46. Pass the needle through the nearest 6mm bead

beaded donut pendant free pattern


47. Pick up 3 x seed beads, 1 x 4mm bead (colour 2), 2 x seed beads and pass the needle
through the same 6mm bead to form a loop

beaded donut pendant free pattern


48. Repeat step 47 once more to form another loop

beaded donut pendant free pattern


49. Both loops should look like this now:

beaded donut pendant free pattern


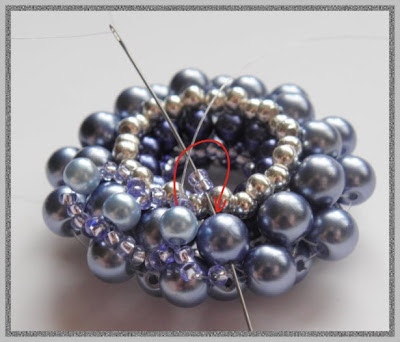
50. Pass the needle through the nearest 6mm bead on the outer edge

beaded donut pendant free pattern


51. Pass the needle through the nearest 6mm bead on the upper half of the pendant

beaded donut pendant free pattern


52. Pick up 2 x seed beads and pass the needle through the 4mm bead added in step 48

beaded donut pendant free pattern


53. Pick up 3 x seed beads and pass the needle through the same 6mm bead

beaded donut pendant free pattern


54. Pick up 2 x seed beads, 1 x 4mm bead, 3 x seed beads and pass the needle again through
the same 6mm bead to form another loop. The thread should be coming out towards the
inner side of the pendant

beaded donut pendant free pattern


55. Pass the needle through the nearest 3mm bead added in step 13

beaded donut pendant free pattern


56. Pass the needle through the nearest 6mm bead

beaded donut pendant free pattern


57. Pick up 3 x seed beads and pass the needle through the 4mm bead added in step 54

beaded donut pendant free pattern


58. Pick up 2 seed beads and pass the needle through the same 6mm bead

beaded donut pendant free pattern


59. Continue with adding 2 seed beads on the inner edge and 3 seed beads on the outer edge
with a 4mm bead in between, until you have added 12 4mm beads in total. Your thread should
be coming out towards the inner side of the pendant

beaded donut pendant free pattern


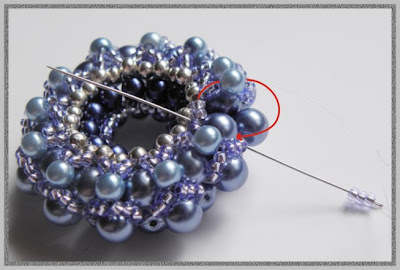
60. Pick up 2 x seed beads and pass the needle through the 4mm bead added in step 47

beaded donut pendant free pattern


61. Pick up 3 x seed beads and pass the needle through the 6mm beads the thread was coming
out at the beginning of the previous step
beaded donut pendant free pattern


62. Your beadwork should look like this at this stage:

beaded donut pendant free pattern


63. Repeat steps 47-61 on the other side of the pendant. At the end pass the needle through the
beads so the thread will be coming out towards the outer edge

beaded donut pendant free pattern


64. Pass the needle through the nearest 6mm beads on the outer edge, no matter whether
it is left or right

beaded donut pendant free pattern


65. Pick up 1 x 4mm bead (colour 2 - or any other colour you wish) and pass the needle
through the nearest 6mm bead on the outer edge

beaded donut pendant free pattern


66. Repeat step 65 until you have added 12 4mm beads

beaded donut pendant free pattern


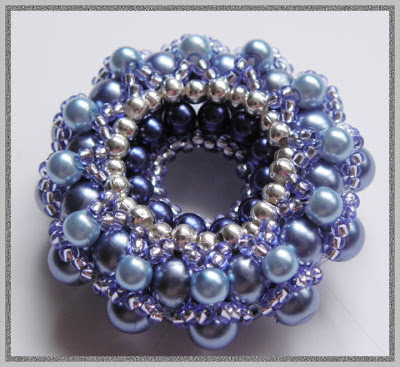
67. End the threads, secure the knots and enjoy your new beaded donut! :)
CONGRATULATIONS! :)


HINT: If you want to make a pendant, you can skip one 4mm bead in step 66, and add a bail,
a jump ring or anything you wish instead. I like adding seed beads and metal bails which
looks like this:

beaded donut pendant free pattern


You are free to use that idea too, only then you should pass through all the 4mm and 6mm
beads on the outer edge a few times, to make sure that the bail is well secured.

Many kinds of beads would work for the pendant, as long as their size is around 4mm, 6mm
and so on. So you can use wax pearls, fire polished beads and any others, as long as they are
more or less round. You can also adjust the number of seed beads, if you wish to use beads
size 15 for example. I wouldn’t suggest using seed beads bigger than size 10 though.

And one more thing for the end... I hope you enjoyed making this pendant and the tutorial
was helpful for you. I will be happy to receive some feedback, and if you have any suggestions
what should be changed in this tutorial, feel free to contact me. If you are going to show this
pendant on your blog or any other website, please give me a credit for being the author of this
pattern.

Happy beading!


Author: Justyna Szlęzak, Eridhan Creations
eridhan.blogspot.com
Unauthorized copying and/ or commercial use prohibited
Copyright by Justyna Szlęzak 2012


--------------------------------------------------------------------------------
The printer friendly pdf file with the whole instruction is available here on Craftsy and Etsy.

Disclaimer: Please do not sell the items you made from the free tutorials. If you want to sell the items, please purchase the pdf files I offer on Craftsy and Etsy - that gives you the right for selling your creations. Thank you.



Sunday, November 11, 2012

Beaded donut - tutorial. Part 2

Keeping my promise and publishing the second part of the tutorial as soon as possible. ;)
So enjoy everyone who was waiting for it. :)


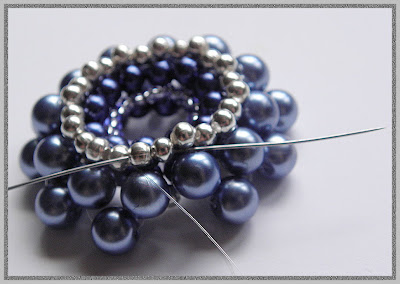
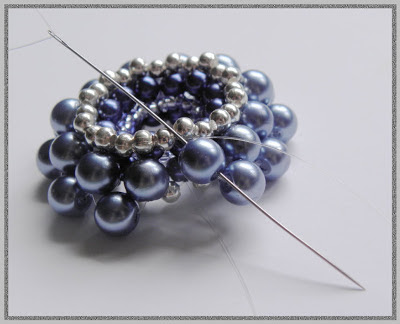
22. Pick up 3 x 6mm beads and pass the needle through the same 3mm bead the thread was
coming out at the beginning of this step

beaded donut pendant free pattern


23. Pass the needle through the next two 3mm beads

beaded donut pendant free pattern


24. Pick up 2 x 6mm beads and pass the needle through the nearest 6mm bead added in step 22

beaded donut pendant free pattern


25. Pass the needle through the same 3mm bead the thread was coming out at the beginning
of the previous step and the next two 3mm beads

beaded donut pendant free pattern


26. Repeat steps 24-25 until you have added 23 6mm beads in total

beaded donut pendant free pattern


27. Pass the needle through the last two 3mm beads and then through the nearest 4mm bead
added in step 22

beaded donut pendant free pattern

beaded donut pendant free pattern


28. Pick up 1 x 6mm bead and pass the needle through the nearest 6mm bead added in step 26
to join both sides altogether

beaded donut pendant free pattern


29. Pass the needle through the 3mm bead between the two joined sides

beaded donut pendant free pattern


30. This is how your beadwork should look like at this stage

beaded donut pendant free pattern


31. And this is how the other side looks like. Now when you are working on the other side,
you can use the thread that was left at the end of step 8. It should be coming out from
the 4mm bead

beaded donut pendant free pattern


32. Pass the needle through the nearest 3mm bead. It doesn’t matter whether it is on the left or
the right side of the 4mm bead the thread is coming out. Choose the direction which is the most
comfortable for you

beaded donut pendant free pattern


33. Pick up 1 x 3mm bead and pass through the next one 3mm bead.

beaded donut pendant free pattern


34. Repeat step 33 until you have added 12 3mm beads in total

beaded donut pendant free pattern


35. Pick up 1 x 6mm bead and pass the needle through the 6mm bead on the outer edge,
below the 3mm bead the thread is coming out

beaded donut pendant free pattern


36. Pick up 1 x 6mm bead and pass the needle through the 3mm bead the thread was coming
out at the beginning of step 35

beaded donut pendant free pattern


37. Pass the needle through the next two 3mm beads

beaded donut pendant free pattern


38. Pick up 1 x 6mm bead, pass the needle through the 6mm bead that is below the 3mm bead,
then pass the needle through the nearest 6mm bead (here the one added in step 35)

beaded donut pendant free pattern


39. Continue with joining upper and lower sides of the pendant until you have added 12 6mm
beads in total

beaded donut pendant free pattern


40. Pass the needle through the next two 3mm beads

beaded donut pendant free pattern


41. Pass the needle through the nearest 6mm bead, added in step 36

beaded donut pendant free pattern


42. Pass the needle through the 6mm bead, below the3mm bead the thread was coming out
at the beginning of previous step

beaded donut pendant free pattern


43. Pass the needle through the nearest 6mm bead added at the end of step 39

beaded donut pendant free pattern


44. Pass the needle through the same 3mm bead the thread was coming out at the beginning
of step 42

beaded donut pendant free pattern


45. This is how your beadwork should look like at this stage:

beaded donut pendant free pattern


If nothing disturbs me, you should expect the third part of this tutorial to be published tomorrow. :)


--------------------------------------------------------------------------------
The printer friendly pdf file with the whole instruction is available here on Craftsy and Etsy.

Disclaimer: Please do not sell the items you made from the free tutorials. If you want to sell the items, please purchase the pdf files I offer on Craftsy and Etsy - that gives you the right for selling your creations. Thank you.


Related Posts Plugin for WordPress, Blogger...