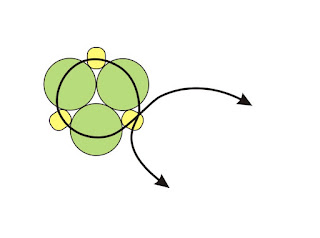
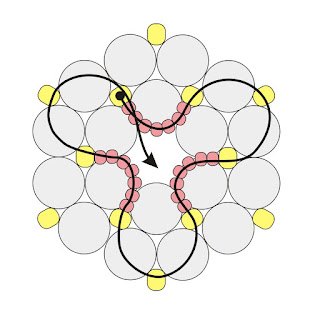
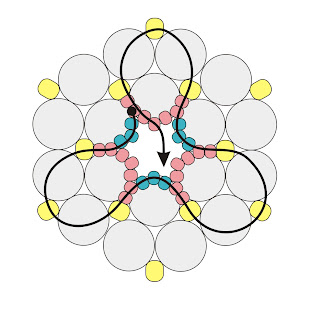
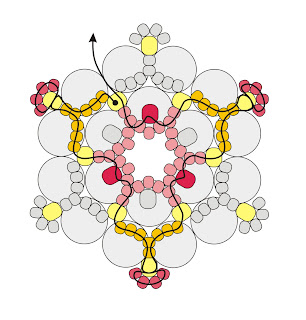
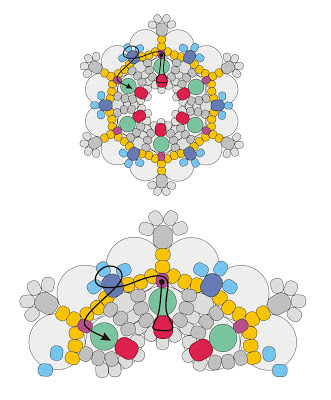
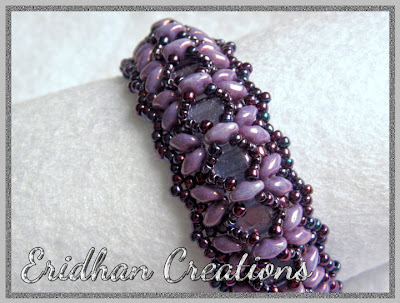
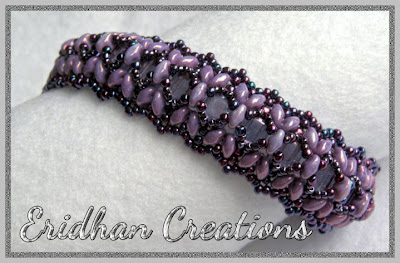
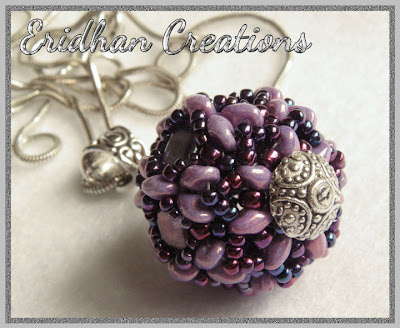
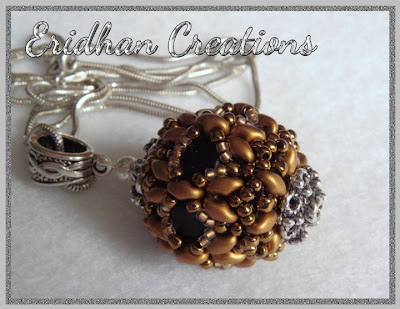
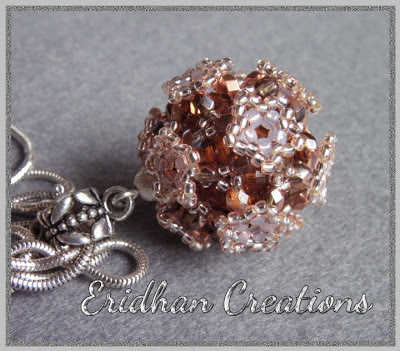
Just as I promised yesterday, I come with another beaded sphere, made with the same pattern from this post. Only this time it's more cold, white and blue with a little bit of rose gold. Something for the winter... although I can't say I love winter really! I'm quite happy with the weather outside... at least it's not that cold. ;)
Even though this one wouldn't look bad on a small Christmas tree either, it is a pendant too. Nothing else you would expect, I assume. ;)
It measures 2,5 cm (1") wide in diameter. The pattern is available in my Etsy
and Craftsy stores.
And this is the winter beaded sphere with its Christmas "friend":
Don't worry now, there will be no more beaded spheres for some time. Time to make another donut instead. ;)
Take care my friends! :)
Showing posts with label beaded bead. Show all posts
Showing posts with label beaded bead. Show all posts
Tuesday, December 10, 2013
Monday, July 22, 2013
Pillows - beaded pendants :)
So, the holidays are over... no more sleeping until noon then, what a shame. ;( Two new beaded pendants - Pillows - can only remind me about that "lazy" (you already know that it was everything but lazy for me) time. One of them was actually made something like two months ago - now it got a companion. Both pendants are made with bicone beads, glass pearls, SuperDuos and Toho beads. They measure 3cm (1,18") /side length/ and are 1,5cm (0,59") thick.
The pattern for the pendant is ready and soon it will be available both on Craftsy and Etsy.
And I have to go back to the kitchen, or the dinner will be burnt. Oh how I love it.... *sigh*
See you later then. :)
EDIT /03.08.2013: Now the pattern has been finally published. You can get it here (Etsy) or here (Craftsy). :)
Sunday, July 14, 2013
The "Ribbon" again - pattern for a matching beaded bead
After making the bracelet from yesterday's post, there was a time for a matching pendant (certainly!). Completely unlike me, I made it pretty fast, despite having a thousand of other things to do, so here you can see it:
It measures around 2,7cm (1,06") in diameter (without the bail). Made with 8mm glass pearls, SuperDuos and Toho seed beads (size 6, 8 and 11).
And this is how the entire set looks like:
The pattern for the pendant is available on Craftsy and Etsy.
And one more thing for the end - I know some of you are waiting for me to respond to your e-mails... I'll do that as soon as possible, I promise! Despite having vacation, the time is more than busy for me now... :/
Lots of hugs for you! :)
Sunday, May 5, 2013
Beaded flower - free tutorial
Finally! I admit it has taken lots of time for me to force myself to some working again. But now, as the spring is already here and the flowers are in bloom, the tutorial for a beaded flower, as I promised in this post, is ready and available to all of you. So enjoy. :)
1. Cut a comfortable length of thread and string: 1 x 6mm round bead, 1 x 8/o seed bead, 1 x 6mm round bead, 1 x 8/o seed bead, 1 x 6mm round bead, 1 x 8/o seed bead and cross the thread in the last bead strung.
2. Pick up 1 x 6mm bead, 1 x 8/o bead, 1 x 6mm bead with the left thread, pick up 1 x 6mm bead with the right thread, pick up 1 x 8/o seed bead and cross both threads in this bead. Repeat four more times.
3. Pick up 1 x 6mm bead, 1 x 8/o bead, 1 x 6mm bead with the left thread, pick up 1 x 6mm bead with the right thread and cross both threads in the nearest 8/o seed bead strung in step 1 as shown in the picture. As you will continue with one thread only you can make a knot to keep better tension.
4. Make sure that your thread is exiting from the 8/o bead and is directed towards the center of your beadwork. Pick up 7 x 11/o seed beads and pass through the next 8/o bead as shown in the picture. Then pass through the 6mm bead, 8/o bead, another 6mm bead and 8/o bead. Repeat the entire step two more times and at the end pass through the two first 11/o beads as it is shown in the picture.
5. Pick up 3 x 11/o seed beads and pass through the two 11/o beads on the other side (you are changing the direction now). Then pass through the 8/o bead, 6mm bead, 8/o bead, 6mm bead, another 8/o bead and two nearest 11/o beads as shown in the picture. Repeat the entire step two more times. At the end pass through the two additional 11/o beads so your thread is exiting from the 4th (middle one) 11/o bead.
6. Pick up 2 x 11/o beads and pass through the middle 11/o bead added in the previous step. Repeat five more times, adding 12 x 11/o beads in total in the center of your beadwork (left picture).
7. Pick up 1 x 8mm round bead and pass through the beads on the opposite side as shown in the middle picture. Push the just added bead gently inside the circle of the 11/o beads - the 8mm bead should be inside the 6mm beads, partially covered by the 11/o beads.
8. Pick up 1 x 15/o seed bead and pass through the next two 11/o beads as shown in the picture on the right. Repeat five more times, adding 6 x 15/o beads in total.
9. Pass through the beads so your thread is exiting from one of the 8/o beads and is directed towards the outer edge of your beadwork as it is shown in the picture.
10. Pick up 5 x 11/o beads and pass through the nearest 8/o bead.
11. Pick up 4 x 11/o beads and pass again through the same 8/o bead, creating a small loop above it.
12. Pass through the two nearest 11/o beads added in step 10.
13. Pick up 3 x 11/o beads and pass through the nearest 8/o bead as shown in the picture.
14. Pass through the three nearest 11/o beads added in steps 4-5.
15. Pick up 1 x 8/o seed bead, skip one 11/o bead and pass through the next three 11/o beads and the 8/o bead as shown in the picture.
16. Repeat steps 10-15 two more times.
17. Change the direction and repeat steps 10-15 three more times.
18. Your thread should be exiting from one of the 8/o beads. Pass through the nearest three 11/o beads added in the previous round as shown in the picture.
19. Pick up 1 x 11/o bead and pass through the next two 11/o beads.
20. Pick up 3 x 11/o beads and pass through the 8/o bead added in the previous round.
21. Pick up 3 x 11/o beads and pass through the two 11/o beads as shown in the picture, the 11/o bead added in step 19 and the next three 11/o beads.
22. Pick up 1 x 8/o bead and pass through the next three 11/o beads.
23. Repeat steps 19-22 five more times. At the end pass through the first 11/o bead added in this round.
24. Pick up 1 x 4mm round bead and pass through the 8/o bead on the opposite side (close to the center of your beadwork). Pass again through the just added 4mm bead, the 11/o bead your thread was exiting at the beginning of this step, and then through the next three 11/o beads and the 8/o bead as shown in the picture.
25. Pick up 3 x 11/o beads and pass again through the same 8/o bead. Then pass through the next four 11/o beads as shown in the picture.
26. Repeat steps 24-25 five more times. At the end your thread should be exiting from one of the 8/o beads added in the previous round (dark blue beads in the picture).
27. Pass through the nearest 11/o bead which is the part of the loop created in the previous round.
28. Pick up 5 x 11/o beads and pass through the two 11/o beads from the loop above 8/o bead on the outer edge of your beadwork as it is shown in the picture.
29. Pick up 1 x 11/o bead and pass through the other two 11/o beads from the loop.
30. Pick up 5 x 11/o beads and pass through the 11/o bead (closest to the hole of the 8/o bead) as shown in the picture, then pass through the 8/o bead.
31. Repeat steps 27-30 five more times.
32. End the thread, make and secure the knots and enjoy your new beaded flower.
This pattern works great as a pendant, a brooch, a part of a necklace or a bracelet - how you will use it, it is only up to your imagination.
And one more thing for the end... I hope you enjoyed making this beaded flower and the tutorial was helpful for you. I will be happy to receive some feedback, and if you have any suggestions what should be changed in this tutorial, feel free to contact me. If you are going to show this piece of jewelry on your blog or any other website, please give me a credit for being the author of this pattern.
Happy beading!
Author: Justyna Szlęzak, Eridhan Creations
eridhan.blogspot.com
Unauthorized copying and/ or commercial use prohibited
Copyright by Justyna Szlęzak 2013
--------------------------------------------------------------------------------------------------
The printer friendly pdf file with the whole instruction is available here on Etsy .
You will need:
The finished piece measures 4,5cm (1,77") in diameter.
1. Cut a comfortable length of thread and string: 1 x 6mm round bead, 1 x 8/o seed bead, 1 x 6mm round bead, 1 x 8/o seed bead, 1 x 6mm round bead, 1 x 8/o seed bead and cross the thread in the last bead strung.
2. Pick up 1 x 6mm bead, 1 x 8/o bead, 1 x 6mm bead with the left thread, pick up 1 x 6mm bead with the right thread, pick up 1 x 8/o seed bead and cross both threads in this bead. Repeat four more times.
3. Pick up 1 x 6mm bead, 1 x 8/o bead, 1 x 6mm bead with the left thread, pick up 1 x 6mm bead with the right thread and cross both threads in the nearest 8/o seed bead strung in step 1 as shown in the picture. As you will continue with one thread only you can make a knot to keep better tension.
4. Make sure that your thread is exiting from the 8/o bead and is directed towards the center of your beadwork. Pick up 7 x 11/o seed beads and pass through the next 8/o bead as shown in the picture. Then pass through the 6mm bead, 8/o bead, another 6mm bead and 8/o bead. Repeat the entire step two more times and at the end pass through the two first 11/o beads as it is shown in the picture.
5. Pick up 3 x 11/o seed beads and pass through the two 11/o beads on the other side (you are changing the direction now). Then pass through the 8/o bead, 6mm bead, 8/o bead, 6mm bead, another 8/o bead and two nearest 11/o beads as shown in the picture. Repeat the entire step two more times. At the end pass through the two additional 11/o beads so your thread is exiting from the 4th (middle one) 11/o bead.
6. Pick up 2 x 11/o beads and pass through the middle 11/o bead added in the previous step. Repeat five more times, adding 12 x 11/o beads in total in the center of your beadwork (left picture).
7. Pick up 1 x 8mm round bead and pass through the beads on the opposite side as shown in the middle picture. Push the just added bead gently inside the circle of the 11/o beads - the 8mm bead should be inside the 6mm beads, partially covered by the 11/o beads.
8. Pick up 1 x 15/o seed bead and pass through the next two 11/o beads as shown in the picture on the right. Repeat five more times, adding 6 x 15/o beads in total.
9. Pass through the beads so your thread is exiting from one of the 8/o beads and is directed towards the outer edge of your beadwork as it is shown in the picture.
10. Pick up 5 x 11/o beads and pass through the nearest 8/o bead.
11. Pick up 4 x 11/o beads and pass again through the same 8/o bead, creating a small loop above it.
12. Pass through the two nearest 11/o beads added in step 10.
13. Pick up 3 x 11/o beads and pass through the nearest 8/o bead as shown in the picture.
14. Pass through the three nearest 11/o beads added in steps 4-5.
15. Pick up 1 x 8/o seed bead, skip one 11/o bead and pass through the next three 11/o beads and the 8/o bead as shown in the picture.
16. Repeat steps 10-15 two more times.
17. Change the direction and repeat steps 10-15 three more times.
18. Your thread should be exiting from one of the 8/o beads. Pass through the nearest three 11/o beads added in the previous round as shown in the picture.
19. Pick up 1 x 11/o bead and pass through the next two 11/o beads.
20. Pick up 3 x 11/o beads and pass through the 8/o bead added in the previous round.
21. Pick up 3 x 11/o beads and pass through the two 11/o beads as shown in the picture, the 11/o bead added in step 19 and the next three 11/o beads.
22. Pick up 1 x 8/o bead and pass through the next three 11/o beads.
23. Repeat steps 19-22 five more times. At the end pass through the first 11/o bead added in this round.
24. Pick up 1 x 4mm round bead and pass through the 8/o bead on the opposite side (close to the center of your beadwork). Pass again through the just added 4mm bead, the 11/o bead your thread was exiting at the beginning of this step, and then through the next three 11/o beads and the 8/o bead as shown in the picture.
25. Pick up 3 x 11/o beads and pass again through the same 8/o bead. Then pass through the next four 11/o beads as shown in the picture.
26. Repeat steps 24-25 five more times. At the end your thread should be exiting from one of the 8/o beads added in the previous round (dark blue beads in the picture).
27. Pass through the nearest 11/o bead which is the part of the loop created in the previous round.
28. Pick up 5 x 11/o beads and pass through the two 11/o beads from the loop above 8/o bead on the outer edge of your beadwork as it is shown in the picture.
29. Pick up 1 x 11/o bead and pass through the other two 11/o beads from the loop.
30. Pick up 5 x 11/o beads and pass through the 11/o bead (closest to the hole of the 8/o bead) as shown in the picture, then pass through the 8/o bead.
31. Repeat steps 27-30 five more times.
32. End the thread, make and secure the knots and enjoy your new beaded flower.
CONGRATULATIONS! :)
This pattern works great as a pendant, a brooch, a part of a necklace or a bracelet - how you will use it, it is only up to your imagination.
And one more thing for the end... I hope you enjoyed making this beaded flower and the tutorial was helpful for you. I will be happy to receive some feedback, and if you have any suggestions what should be changed in this tutorial, feel free to contact me. If you are going to show this piece of jewelry on your blog or any other website, please give me a credit for being the author of this pattern.
Happy beading!
Author: Justyna Szlęzak, Eridhan Creations
eridhan.blogspot.com
Unauthorized copying and/ or commercial use prohibited
Copyright by Justyna Szlęzak 2013
--------------------------------------------------------------------------------------------------
The printer friendly pdf file with the whole instruction is available here on Etsy .
Disclaimer: Please do not sell the items you made from the free tutorials. If you want to sell the items, please purchase the pdf files I offer on Craftsy and Etsy - that gives you the right for selling your creations. Thank you.
Tuesday, April 16, 2013
Dragonflies. Beaded beads and bracelets.
I know, I know, they don't really look like dragonflies. But if you take a look at the ornament made with SuperDuo beads, it does look like a row of tiny dragonflies... or is it just my crazy imagination? ;)
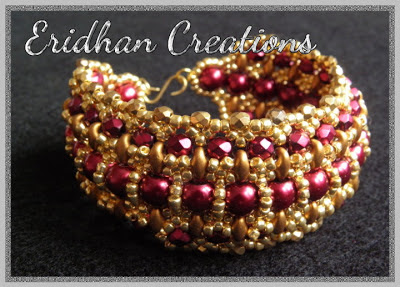
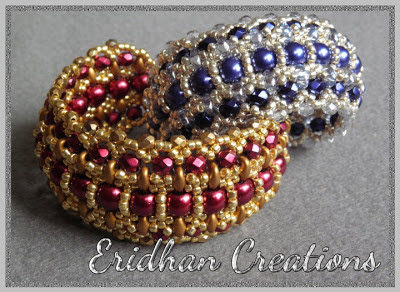
Anyway, a new beading pattern is ready and available in my Etsy and Craftsy stores, for both a beaded bead and a matching bracelet. They are made with CzechMate Tiles, SuperDuo and 11/o Toho beads. The pendant measures 2x2,5 cm (0,78x1"), and the bracelet is 2 cm (0,78") wide.
A bit time consuming, but still I have made more than one piece with each pattern. And I'm planning to make even more... ;)
For now though let me show you the set:
Plus another beaded bead...
...and another bracelet. Actually, my favourite one! For this one I have used some magatama drops too.
Yep, it looks like I have finally started making something more than just pendants... and there will be more bracelets appearing on here soon. So until the next time. :)
Anyway, a new beading pattern is ready and available in my Etsy and Craftsy stores, for both a beaded bead and a matching bracelet. They are made with CzechMate Tiles, SuperDuo and 11/o Toho beads. The pendant measures 2x2,5 cm (0,78x1"), and the bracelet is 2 cm (0,78") wide.
A bit time consuming, but still I have made more than one piece with each pattern. And I'm planning to make even more... ;)
For now though let me show you the set:
And both pieces separately:
Plus another beaded bead...
...and another bracelet. Actually, my favourite one! For this one I have used some magatama drops too.
Yep, it looks like I have finally started making something more than just pendants... and there will be more bracelets appearing on here soon. So until the next time. :)
Wednesday, March 20, 2013
Another spiky pendant
Spiky, but not that dangerous I think. ;) Another pendant made with spike beads, fire polished beads and seed beads, with a wax pearl in the middle. The white, black and metallic grey colours make it look a bit classic, the shape however says no, not classic at all! Classic or not, I am going to wear it anyway. ;)
It measures 4,5cm (1,77" ) at the widest point (with spikes), however the main beaded part measures 2,5cm (1").
And this is the pendant:
It was so easy to make though that I am very tempted to make another one. I am going back to beading then! ;)
It measures 4,5cm (1,77" ) at the widest point (with spikes), however the main beaded part measures 2,5cm (1").
And this is the pendant:
It was so easy to make though that I am very tempted to make another one. I am going back to beading then! ;)
Monday, March 18, 2013
Back to the life - with some new beading patterns of course ;)
So, here I am again - staying in bed was extremely boring, trust me - but at least I could do some other work, not exactly beading though, but related to beading. Two new tutorials for the patterns that have been already presented here, plus another one, for dodecahedral earrings. Yep I know, it's pretty amazing that I managed to make another pair of earrings instead of just these boring pendants. ;) Anyway I hope you'll like them - both the pendants and the earrings really. ;)
Okay, the first is the pattern for the dodecahedral earrings. Beaded beads made with 4mm wax pearls, 11/o seed beads and 2mm metal ball, measuring around 2,5cm (1") in the widest point - in fact they look a bit smaller than they are in reality, probably because they're not the perfect spheres.
And these earrings look like this:
And a close-up:
This tutorial is available here (Etsy) and here (Craftsy).
The second pattern I have made is for the netted beaded pendant, that you could see already in this post. But there are two more such pendants, that you can see below:

The pendant, as you can see, is mostly made with 6mm wax pearls and 11/o seed beads. It measures around 4cm (1,57") in diameter. Quite easy and fast to make, and you can find the tutorial here and here. :)
And finally, the last pattern, for another beaded ball - or a beaded bead, whatever you wish. ;)
Small ornamental ball, not exceeding 2,5cm (1") in diameter, made with fire polished beads and 11/o & 15/o seed beads. Tiny, but quite eye-catching. Better for a pendant though than for the earrings in my humble opinion... but it can serve in any way you wish. ;)
The tutorial for this beaded bead is available here and here.
Now, if you excuse me, I'm going back to bed. Time to get some rest - but I'll see you all soon again. :)
Wednesday, March 13, 2013
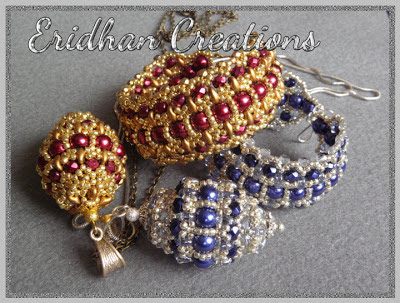
Queen of Fire, Queen of Ice - beaded beads and bracelets with tutorials
Queen of Fire. Gold and rubies.... if such a queen had ever existed, I hope she would have been willing to wear such jewelry. Her sister, Queen of Ice hopefully would have chosen a set made with cold silver and sapphires. But such queens don't exist, so both sets are mine! ;D
The bracelets and matching pendants are made with wax pearls, SuperDuo beads, Toho 11/o and fire polished beads in two sizes. The beaded bead that works as a pendant is 3,7cm (1,45") long and 2,7cm (1,06") wide, the bracelet is 2,5cm (1") wide. Both patterns are accompanied with tutorials. :)
So, here's the set for the Queen of Fire:
And the set for the Queen of Ice:
And both sets together. :)
And I am going to say goodbye for now... and a couple of more days. The next chemotherapy awaits me, so wish me luck... and hopefully I'll see you soon again. Hugs to all of you! :)
Subscribe to:
Comments (Atom)


