Showing posts with label beaded donut. Show all posts

Thursday, December 12, 2013

Beaded donut

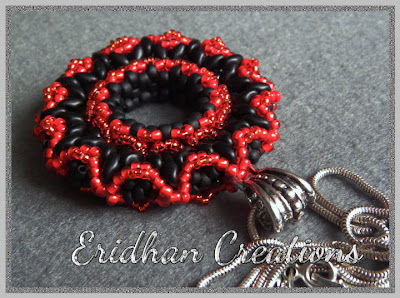
As it was promised, no more beaded spheres. It's time for another beaded donut though. A piece made from an old pattern introduced in this post, but I wanted to make it again, with some different colour combination. So there we have a black, hematite and copper donut... only the copper beads look too light in the pictures for some reason. They're a bit darker in reality, which I couldn't really capture. Unfortunately, it's not the best time of the year for taking good quality photos if you don't have any light tent and you count for a daylight only...

The pendant is made with Toho seed beads size 11 and 8 as well as fire polished beads (3mm and 4mm). It measures around 5cm (2") in diameter without the bail and the pattern is available in my Etsy and Craftsy stores.

It was the last piece made from an existing pattern. I have made a few new designs, only I'm waiting for the weekend to take the pictures. You should be able to see them soon. :)

Oh, and I've got one word to Asia! If you want to try the pattern out again, I might have a hint for you. ;)

Anyway, that's the pendant. :)

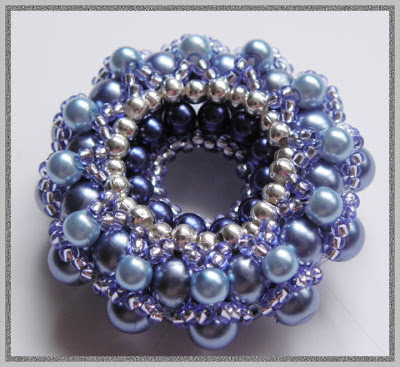
beaded donut pendant

 beaded donut pendant

Thank you for coming here and I'll see you all again soon. :)


Wednesday, August 7, 2013

A beaded donut again! ;)

It has been a while since I have made a beaded donut... but it's been even longer since I have published one here. ;)

The two beaded donuts you can see here were made exactly four weeks ago! That shows how slow I am with writing the tutorials... Even the drawings were finished soon after the pendants were made, but today, despite the heat, I finally forced myself to do some work, so the detailed instruction is ready too. It's a very easy pattern, but you should have some experience with peyote stitch in order to make it. It might prove to be too difficult otherwise.

The donuts are made with Toho seed beads size 11 and 8, as well as 3mm and 4mm fire polished beads. They measure around 5cm (2") in diameter without the bail.

You can get the tutorial on Etsy or Craftsy. :)

beaded donut pattern

beaded donut tutorial

beaded donut pattern

beaded donut tutorial

I hope you're not suffering too much from the heat. I do! But I'm not going to complain, we have a wonderful summer, after all! :)
Hugs and I'll see you again soon. :)


Tuesday, April 2, 2013

Aztec Sun - another donut pendant and two new awards :)

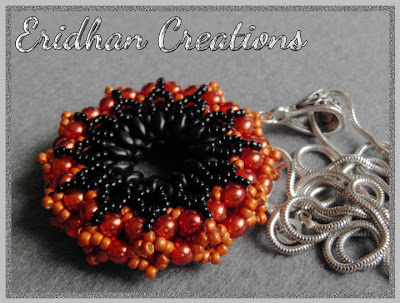
After making a few patterns with spike beads, I had to get some rest from them. And as it's been some time now since I have made a donut pendant, I came up with an idea for another one. Again with SuperDuo beads, 'cause they are so nice to work with! That's how "Aztec Sun" has been made.

It is also made with 8/o, 11/o and 15/o Toho seed beads as well as glass pearls. It measures 4,5 cm (1,77") in diameter.

The pattern is available on Etsy and Craftsy.

beaded donut pendant

beaded donut pattern

beaded donut tutorial

super duo pendant pattern


And one more thing... I have got two very nice awards recently, which I would like to say a huge THANK YOU for. The first one came from bluefairy - Thank you Asia very, very much, I would never expect such a great award, and it really meant a lot to me. :)


The second one I got from . Again, didn't expect to be awarded... I can be only happy that you find the blog's content good enough.


I'm sending you lots of hugs, girls! :)

Also, I am very happy to see some new followers - I'm really glad you visit this blog. I hope you won't find it too boring though... at least not too soon. ;)

And one more thing for the end... Would you like a free pattern for a flower like in the picture below? Works perfectly as a pendant (of course!) or a brooch (tested too). It's been some time since I made a free tutorial and I thought that I could do that for this pattern... But it's only up to you, whether you would like to have it or not. ;)


Sunday, March 10, 2013

Another beaded donut and another pattern. ;)

Can't say that I was forced to make it again... but Wiosenna seemed to really like this beaded donut and requested a tutorial. Considering that making the first one, which you can see here, was a nightmare both for me and the needles, I was absolutely sure that I would never ever try to make it again, not to mention that I would never even try to convince a fellow beader to make it either.

But I must admit, that her request made me search for an easier way to make it. It wasn't that bad pattern after all, was it? I wanted to help her though, so I thought that a better way must exist! And I have managed to find it, so now the tutorial is available to all of you too. :)

Moreover, it was that easy, that I managed to make two more such beaded donuts within just one evening! ;)

I hope that Wiosenna is happy now, since she got the pattern before it has even been published. ;)

Everyone else can get it on Craftsy or Etsy.


beaded donut pendant

beaded donut pattern

beaded donut tutorial

beaded donut pendant

Wednesday, March 6, 2013

Sunny beaded donut

It's been a while since I have shown a beaded donut here... it doesn't mean though that I haven't made one. ;)

This pendant was made more than a week ago, but it probably didn't deserve to be published earlier. ;) It is made with 4mm glass pearls, SuperDuo beads and Toho beads size 11 and 15. It measures 4 cm (1,57") in diameter. Both sides of the donut look exactly the same.

Quite sunny, isn't it? ;)

beaded donut pendant

beaded donut


Saturday, February 9, 2013

Things you can make in bed ;)

Whatever you think it can be, it is still about beading, you know. ;)

A simple pendant that has been created while I had to stay in bed after the chemotherapy... so instead of getting some rest, I didn't want to waste time and did some beading. The effect you can see below:

beaded pendant
 
beaded pendant


It consists of seed beads size 15, 11 and 8, 4mm bicone crystals, 6mm wax pearls and 8mm round beads. It measures 4,5 cm (1,77") in diameter. And I guess it can count as another donut pendant. ;)

I have some more pendants - and earrings (yes, earrings too! ;) ) to show - so stay tuned. The next update - tomorrow. ;)


Wednesday, January 23, 2013

My favourite beaded donut again. ;)

Only not made with wax pearls, but fire polished beads instead. That has made it look a bit different. And more flat too, compared to the previous projects. The cherry beads used for it though are absoultely amazing! Not sure if I have ever seen the more beautiful shade of red really! Along with the hematite beads, they give quite a nice result, don't you think? ;)

beaded donut pendant

As always, the pendant is 4cm (1,57") wide in diameter.

The second thing to show is a necklace. A 3cm wide, black matte lava bead bezeled with white Toho rounds size 11 and 15. It hangs on a beaded rope made with cubic right angle weave stitch - a very flexible one. The total length of the necklace is around 60 cm (12"). The rope however can be worn alone too.

So, that's the necklace:

beaded necklace

And a close-up:

beaded necklace


Next time there will be some bracelets... or maybe beaded core beads? I haven't decided yet. ;P


Sunday, December 16, 2012

Just another donut pendant... and a little thief ;)

It's been a long time since the last entry... Well the illness doesn't really help me in updating this blog more often, it doesn't mean though that I don't do any beading at all. In fact I do lots of beading, since it is more or less the only thing that helps me to relax and doesn't make me too tired either... So, there's a few new things for you to see. :)

As the title says, another beaded donut has been made recently. In fact it is more or less exactly the same pattern as the one from here, only with some different beads - oval spectra beads 11x8 mm, and some different embellishment too. And they do make quite a difference, don't you think? ;)

beaded donut pendant


The other side of this pendant looks almost the same. But only almost. ;)

beaded donut pendant

The pendant measures 4,5 cm (1,57") in diameter.

And since I got to like those beads quite much, I have used them for some other project too. A simple necklace with a core beaded bead, that can be slided up and down on the ropes, so it can be worn in a few different ways. It has been quite a challenge though to take a picture of it... It's all because a certain black devil has appeared out of nowhere...

beaded core bead


...and decided to steal it for herself. ;)

beaded core bead


The devil was generous enough though to allow me to take some more pictures before she had taken the necklace with her. Thank you, devil, for being so kind! ;)

So, this is how the necklace can be worn:

beaded necklacebeaded necklace


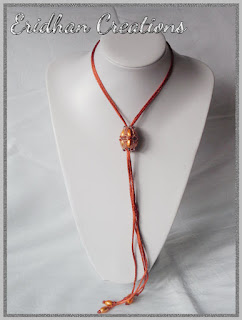
And the core bead (3,3cm long and 2,5cm wide) looks like this:

beaded core bead


And soon there will be another blog entry with some new beadwork for you to see. :)


Tuesday, November 13, 2012

Beaded donut - tutorial. Part 3

The last part of the tutorial! I'm sorry that you had to wait for one day longer though... I still hope you will enjoy it anyway. :)


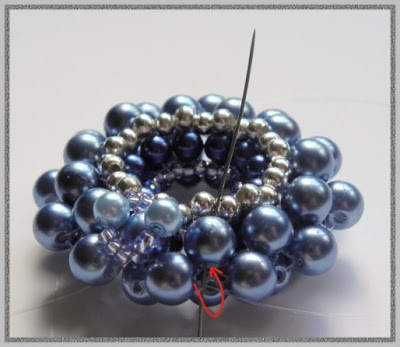
46. Pass the needle through the nearest 6mm bead

beaded donut pendant free pattern


47. Pick up 3 x seed beads, 1 x 4mm bead (colour 2), 2 x seed beads and pass the needle
through the same 6mm bead to form a loop

beaded donut pendant free pattern


48. Repeat step 47 once more to form another loop

beaded donut pendant free pattern


49. Both loops should look like this now:

beaded donut pendant free pattern


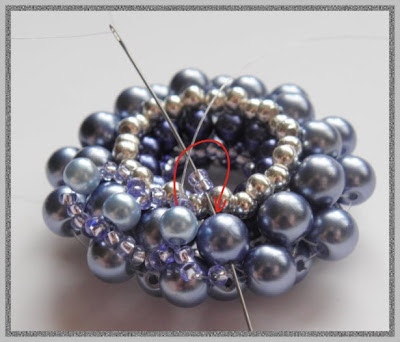
50. Pass the needle through the nearest 6mm bead on the outer edge

beaded donut pendant free pattern


51. Pass the needle through the nearest 6mm bead on the upper half of the pendant

beaded donut pendant free pattern


52. Pick up 2 x seed beads and pass the needle through the 4mm bead added in step 48

beaded donut pendant free pattern


53. Pick up 3 x seed beads and pass the needle through the same 6mm bead

beaded donut pendant free pattern


54. Pick up 2 x seed beads, 1 x 4mm bead, 3 x seed beads and pass the needle again through
the same 6mm bead to form another loop. The thread should be coming out towards the
inner side of the pendant

beaded donut pendant free pattern


55. Pass the needle through the nearest 3mm bead added in step 13

beaded donut pendant free pattern


56. Pass the needle through the nearest 6mm bead

beaded donut pendant free pattern


57. Pick up 3 x seed beads and pass the needle through the 4mm bead added in step 54

beaded donut pendant free pattern


58. Pick up 2 seed beads and pass the needle through the same 6mm bead

beaded donut pendant free pattern


59. Continue with adding 2 seed beads on the inner edge and 3 seed beads on the outer edge
with a 4mm bead in between, until you have added 12 4mm beads in total. Your thread should
be coming out towards the inner side of the pendant

beaded donut pendant free pattern


60. Pick up 2 x seed beads and pass the needle through the 4mm bead added in step 47

beaded donut pendant free pattern


61. Pick up 3 x seed beads and pass the needle through the 6mm beads the thread was coming
out at the beginning of the previous step
beaded donut pendant free pattern


62. Your beadwork should look like this at this stage:

beaded donut pendant free pattern


63. Repeat steps 47-61 on the other side of the pendant. At the end pass the needle through the
beads so the thread will be coming out towards the outer edge

beaded donut pendant free pattern


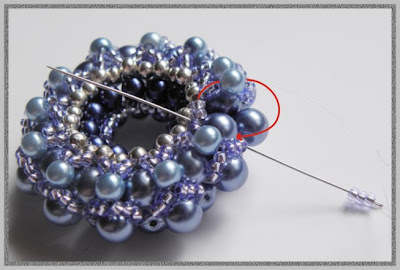
64. Pass the needle through the nearest 6mm beads on the outer edge, no matter whether
it is left or right

beaded donut pendant free pattern


65. Pick up 1 x 4mm bead (colour 2 - or any other colour you wish) and pass the needle
through the nearest 6mm bead on the outer edge

beaded donut pendant free pattern


66. Repeat step 65 until you have added 12 4mm beads

beaded donut pendant free pattern


67. End the threads, secure the knots and enjoy your new beaded donut! :)
CONGRATULATIONS! :)


HINT: If you want to make a pendant, you can skip one 4mm bead in step 66, and add a bail,
a jump ring or anything you wish instead. I like adding seed beads and metal bails which
looks like this:

beaded donut pendant free pattern


You are free to use that idea too, only then you should pass through all the 4mm and 6mm
beads on the outer edge a few times, to make sure that the bail is well secured.

Many kinds of beads would work for the pendant, as long as their size is around 4mm, 6mm
and so on. So you can use wax pearls, fire polished beads and any others, as long as they are
more or less round. You can also adjust the number of seed beads, if you wish to use beads
size 15 for example. I wouldn’t suggest using seed beads bigger than size 10 though.

And one more thing for the end... I hope you enjoyed making this pendant and the tutorial
was helpful for you. I will be happy to receive some feedback, and if you have any suggestions
what should be changed in this tutorial, feel free to contact me. If you are going to show this
pendant on your blog or any other website, please give me a credit for being the author of this
pattern.

Happy beading!


Author: Justyna Szlęzak, Eridhan Creations
eridhan.blogspot.com
Unauthorized copying and/ or commercial use prohibited
Copyright by Justyna Szlęzak 2012


--------------------------------------------------------------------------------
The printer friendly pdf file with the whole instruction is available here on Craftsy and Etsy.

Disclaimer: Please do not sell the items you made from the free tutorials. If you want to sell the items, please purchase the pdf files I offer on Craftsy and Etsy - that gives you the right for selling your creations. Thank you.


Related Posts Plugin for WordPress, Blogger...