Sunday, May 5, 2013

Beaded flower - free tutorial

Finally! I admit it has taken lots of time for me to force myself to some working again. But now, as the spring is already here and the flowers are in bloom, the tutorial for a beaded flower, as I promised in this post, is ready and available to all of you. So enjoy. :)

beaded flower free pattern

beaded flower free pattern

 
You will need:

beaded flower free pattern

The finished piece measures 4,5cm (1,77") in diameter.


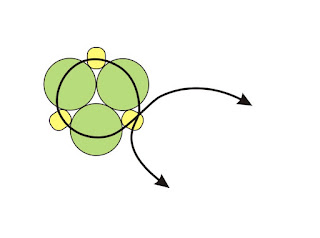
1. Cut a comfortable length of thread and string: 1 x 6mm round bead, 1 x 8/o seed bead, 1 x 6mm round bead, 1 x 8/o seed bead, 1 x 6mm round bead, 1 x 8/o seed bead and cross the thread in the last bead strung.
beaded flower free pattern
2. Pick up 1 x 6mm bead, 1 x 8/o bead, 1 x 6mm bead with the left thread, pick up 1 x 6mm bead with the right thread, pick up 1 x 8/o seed bead and cross both threads in this bead. Repeat four more times.
3. Pick up 1 x 6mm bead, 1 x 8/o bead, 1 x 6mm bead with the left thread, pick up 1 x 6mm bead with the right thread and cross both threads in the nearest 8/o seed bead strung in step 1 as shown in the picture. As you will continue with one thread only you can make a knot to keep better tension.
beaded flower free pattern

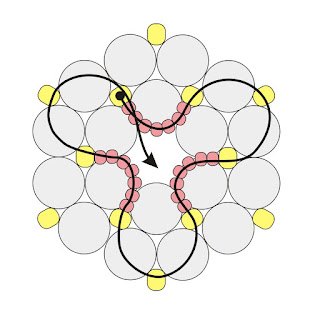
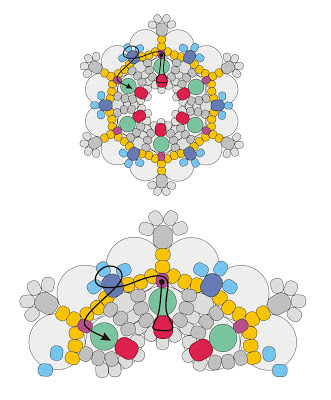
4. Make sure that your thread is exiting from the 8/o bead and is directed towards the center of your beadwork. Pick up 7 x 11/o seed beads and pass through the next 8/o bead as shown in the picture. Then pass through the 6mm bead, 8/o bead, another 6mm bead and 8/o bead. Repeat the entire step two more times and at the end pass through the two first 11/o beads as it is shown in the picture.

beaded flower free pattern

5. Pick up 3 x 11/o seed beads and pass through the two 11/o beads on the other side (you are changing the direction now). Then pass through the 8/o bead, 6mm bead, 8/o bead, 6mm bead, another 8/o bead and two nearest 11/o beads as shown in the picture. Repeat the entire step two more times. At the end pass through the two additional 11/o beads so your thread is exiting from the 4th (middle one) 11/o bead.

beaded flower free pattern

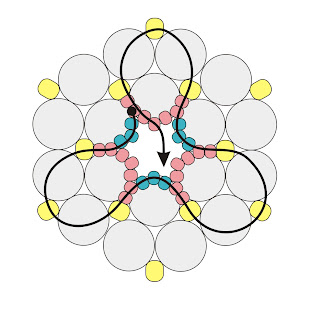
6. Pick up 2 x 11/o beads and pass through the middle 11/o bead added in the previous step. Repeat five more times, adding 12 x 11/o beads in total in the center of your beadwork (left picture).

7. Pick up 1 x 8mm round bead and pass through the beads on the opposite side as shown in the middle picture. Push the just added bead gently inside the circle of the 11/o beads - the 8mm  bead should be inside the 6mm beads, partially covered by the 11/o beads.

8. Pick up 1 x 15/o seed bead and pass through the next two 11/o beads as shown in the picture on the right. Repeat five more times, adding 6 x 15/o beads in total.

beaded flower free pattern

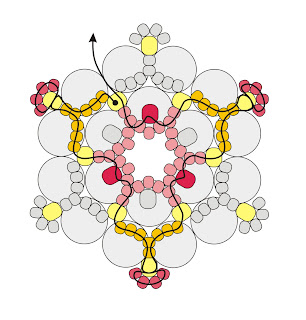
9. Pass through the beads so your thread is exiting from one of the 8/o beads and is directed towards the outer edge of your beadwork as it is shown in the picture.
10. Pick up 5 x 11/o beads and pass through the nearest 8/o bead.
11. Pick up 4 x 11/o beads and pass again through the same 8/o bead, creating a small loop above it.
12. Pass through the two nearest 11/o beads added in step 10.
13. Pick up 3 x 11/o beads and pass through the nearest 8/o bead as shown in the picture.
14. Pass through the three nearest 11/o beads added in steps 4-5.
15. Pick up 1 x 8/o seed bead, skip one 11/o bead and pass through the next three 11/o beads and the 8/o bead as shown in the picture.
16. Repeat steps 10-15 two more times.

beaded flower free pattern
17. Change the direction and repeat steps 10-15 three more times.

beaded flower free pattern

18. Your thread should be exiting from one of the 8/o beads. Pass through the nearest three 11/o beads added in the previous round as shown in the picture.
19. Pick up 1 x 11/o bead and pass through the next two 11/o beads.
20. Pick up 3 x 11/o beads and pass through the 8/o bead added in the previous round.
21. Pick up 3 x 11/o beads and pass through the two 11/o beads as shown in the picture, the 11/o bead added in step 19 and the next three 11/o beads.
22. Pick up 1 x 8/o bead and pass through the next three 11/o beads.
23. Repeat steps 19-22 five more times. At the end pass through the first 11/o bead added in this round.
beaded flower free pattern

24. Pick up 1 x 4mm round bead and pass through the 8/o bead on the opposite side (close to the center of your beadwork). Pass again through the just added 4mm bead, the 11/o bead your thread was exiting at the beginning of this step, and then through the next three 11/o beads and the 8/o bead as shown in the picture.
25. Pick up 3 x 11/o beads and pass again through the same 8/o bead. Then pass through the next four 11/o beads as shown in the picture.
26. Repeat steps 24-25 five more times. At the end your thread should be exiting from one of the 8/o beads added in the previous round (dark blue beads in the picture).


beaded flower free pattern


27. Pass through the nearest 11/o bead which is the part of the loop created in the previous round.
28. Pick up 5 x 11/o beads and pass through the two 11/o beads from the loop above 8/o bead on the outer edge of your beadwork as it is shown in the picture.
29. Pick up 1 x 11/o bead and pass through the other two 11/o beads from the loop.
30. Pick up 5 x 11/o beads and pass through the 11/o bead (closest to the hole of the 8/o bead) as shown in the picture, then pass through the 8/o bead.
31. Repeat steps 27-30 five more times.

beaded flower free pattern

32. End the thread, make and secure the knots and enjoy your new beaded flower. 

CONGRATULATIONS! :)

This pattern works great as a pendant, a brooch, a part of a necklace or a bracelet - how you will use it, it is only up to your imagination.

And one more thing for the end... I hope you enjoyed making this beaded flower and the tutorial was helpful for you. I will be happy to receive some feedback, and if you have any suggestions what should be changed in this tutorial, feel free to contact me. If you are going to show this piece of jewelry on your blog or any other website, please give me a credit for being the author of this pattern. 


Happy beading!


Author: Justyna Szlęzak, Eridhan Creations
eridhan.blogspot.com


Unauthorized copying and/ or commercial use prohibited
Copyright by Justyna Szlęzak 2013


--------------------------------------------------------------------------------------------------
The printer friendly pdf file with the whole instruction is available here on Etsy .

Disclaimer: Please do not sell the items you made from the free tutorials. If you want to sell the items, please purchase the pdf files I offer on Craftsy and Etsy - that gives you the right for selling your creations. Thank you.

Tuesday, April 16, 2013

Dragonflies. Beaded beads and bracelets.

I know, I know, they don't really look like dragonflies. But if you take a look at the ornament made with SuperDuo beads, it does look like a row of tiny dragonflies... or is it just my crazy imagination? ;)

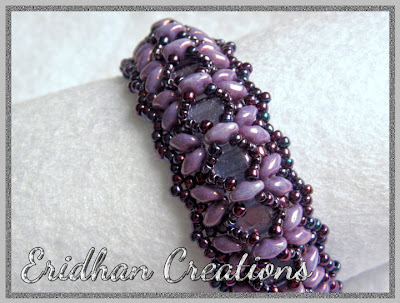
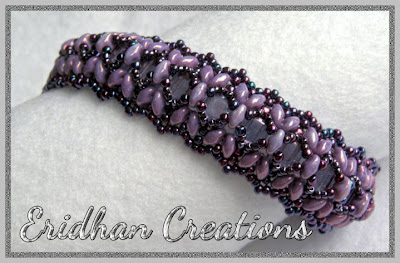
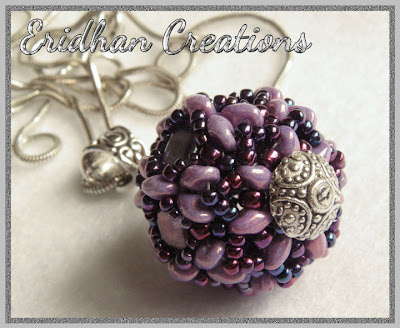
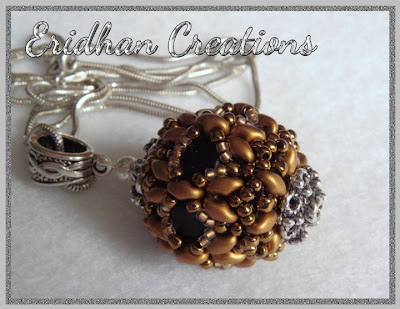
Anyway, a new beading pattern is ready and available in my Etsy and Craftsy stores, for both a beaded bead and a matching bracelet. They are made with CzechMate Tiles, SuperDuo and 11/o Toho beads. The pendant measures 2x2,5 cm (0,78x1"), and the bracelet is 2 cm (0,78") wide.

A bit time consuming, but still I have made more than one piece with each pattern. And I'm planning to make even more... ;)

For now though let me show you the set:

beading tutorial


And both pieces separately:

beaded bracelet pattern

beaded bracelet tutorial

beaded bead pattern

beaded bead tutorial


Plus another beaded bead...

 
beaded bead pendant pattern

beaded bead pendant tutorial
 
beaded bead pattern

beaded bead tutorial


...and another bracelet. Actually, my favourite one! For this one I have used some magatama drops too.
 
beaded bracelet pattern

super duo bracelet pattern

super duo bracelet tutorial


Yep, it looks like I have finally started making something more than just pendants... and there will be more bracelets appearing on here soon. So until the next time. :)


Sunday, April 14, 2013

Reversible beaded bracelets

It has been a long while since the last entry... I neglected the blog a bit because of the damned treatment... I am sorry though that I have neglected your blogs too... but that will change once I regain my usual energy, I promise. :) Still I tried to do some beading during the last weeks - well, even a chemo can't stop me from doing that, after all. ;)

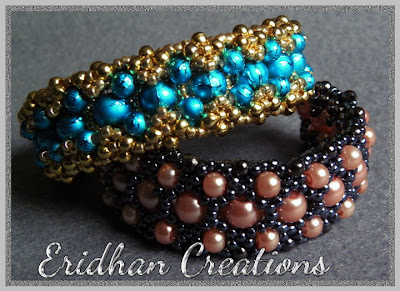
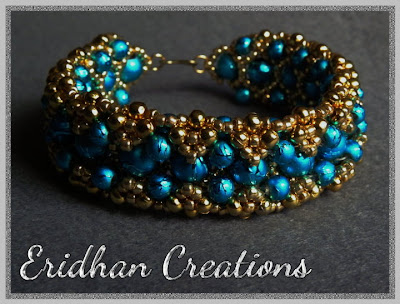
So, there are quite a few things that are currently waiting to be shown on here. I will start with the two oldest ones though, reversible, double-layered bracelets. They are different on both sides, so you actually have two bracelets in one.

They are made with 6mm, 4mm and 3mm round beads as well Toho seed beads size 11. They are 1,8cm (0,70") wide. And the pattern is available, as always, on Etsy and Craftsy.


beaded bracelet pattern

beaded bracelet pattern

beaded bracelet tutorial
 
beaded bracelet tutorial


 More bracelets... and pendants (of course!) soon. :)


Tuesday, April 2, 2013

Aztec Sun - another donut pendant and two new awards :)

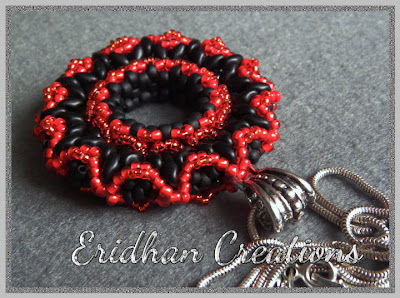
After making a few patterns with spike beads, I had to get some rest from them. And as it's been some time now since I have made a donut pendant, I came up with an idea for another one. Again with SuperDuo beads, 'cause they are so nice to work with! That's how "Aztec Sun" has been made.

It is also made with 8/o, 11/o and 15/o Toho seed beads as well as glass pearls. It measures 4,5 cm (1,77") in diameter.

The pattern is available on Etsy and Craftsy.

beaded donut pendant

beaded donut pattern

beaded donut tutorial

super duo pendant pattern


And one more thing... I have got two very nice awards recently, which I would like to say a huge THANK YOU for. The first one came from bluefairy - Thank you Asia very, very much, I would never expect such a great award, and it really meant a lot to me. :)


The second one I got from . Again, didn't expect to be awarded... I can be only happy that you find the blog's content good enough.


I'm sending you lots of hugs, girls! :)

Also, I am very happy to see some new followers - I'm really glad you visit this blog. I hope you won't find it too boring though... at least not too soon. ;)

And one more thing for the end... Would you like a free pattern for a flower like in the picture below? Works perfectly as a pendant (of course!) or a brooch (tested too). It's been some time since I made a free tutorial and I thought that I could do that for this pattern... But it's only up to you, whether you would like to have it or not. ;)


Saturday, March 30, 2013

Sting - beaded pendant

As promised in the last post, another pendant made with spike beads. Oh alright, only one spike bead was used this time, but it's a very important one! ;)

Sting, as this is how it's named, is also made with Toho seed beads size 11/o and 15/o, SuperDuo beads plus 3mm & 4mm fire polished beads. It is 4,7 cm (1,85" ) long (without the bail) and 3 cm (1,18") wide in the widest point.
So this is another spiky pendant in my collection... and another tutorial, which is available, as always, on Etsy and Craftsy.

spike beads pendant pattern

spike beads pendant tutorial

beaded pendant pattern

beaded pendant tutorial

beaded pendant with spike beads


And now I'm wishing you all Happy Easter! :)


Tuesday, March 26, 2013

Spiky Flower - beaded pendant

Finally! The pictures for the pendant were taken some time ago, and yet I just couldn't find enough time to write the post and show it to you. In the meantime though I prepared a tutorial how to make it, then made another spiky pendant... and another one... but today there's only the spiky flower for you to see. ;)

Spiky Flower was made with 8mm spike beads (of course!), 3mm fire polished beads and Toho seed beads size 11/o and 15/o... it is quite small, as it measures only 3,5 cm (1,38") in diameter.

The pattern can be found here and here.


spike beads pattern
 
spike beads pattern

spike beads pattern

spike beads pattern


In the next blog entry - The Sting. So stay tuned. ;)


Friday, March 22, 2013

More spikes and more patterns! ;)

I have to admit, I have fallen in love with spike beads. It means that you will see a couple of more pendants made with these beads soon. Two of them are already made, however the first one isn't a new pattern - it is actually the same as in the previous post. Oh well, had to make a more innocent version of the black and white pendant. And is there anything more innocent than pink? ;) It still has some claws though. ;)

And it has got a name! It's called "Wind Rose" now, as in fact it was the first thing I thought about after I had finished the previous pendant. It wasn't only me though, blond has said exactly the same when she saw it. ;)

So, here's the pink Wind Rose:

beaded pendant pattern

spike beads pendant tutorial

And here you can find the pattern: Craftsy and Etsy. ;)


The second pendant however won't be shown until I take a good picture... Maybe tomorrow?
I'll see you until then. :)

Related Posts Plugin for WordPress, Blogger...