46. Pass the needle through the nearest 6mm bead
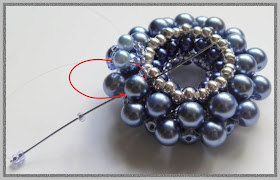
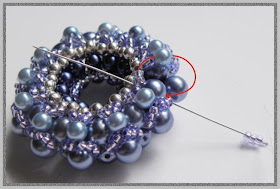
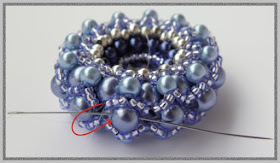
47. Pick up 3 x seed beads, 1 x 4mm bead (colour 2), 2 x seed beads and pass the needle
through the same 6mm bead to form a loop
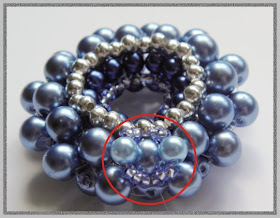
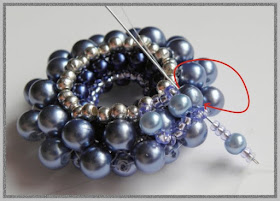
48. Repeat step 47 once more to form another loop
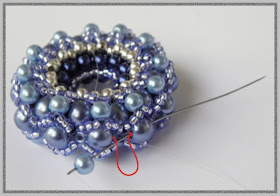
49. Both loops should look like this now:
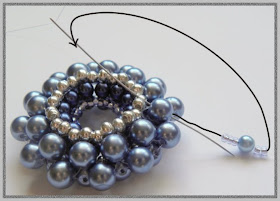
50. Pass the needle through the nearest 6mm bead on the outer edge
51. Pass the needle through the nearest 6mm bead on the upper half of the pendant
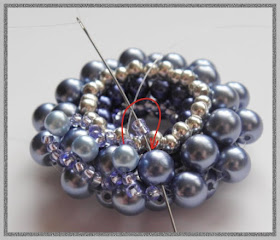
52. Pick up 2 x seed beads and pass the needle through the 4mm bead added in step 48
53. Pick up 3 x seed beads and pass the needle through the same 6mm bead
54. Pick up 2 x seed beads, 1 x 4mm bead, 3 x seed beads and pass the needle again through
the same 6mm bead to form another loop. The thread should be coming out towards the
inner side of the pendant
55. Pass the needle through the nearest 3mm bead added in step 13
56. Pass the needle through the nearest 6mm bead
57. Pick up 3 x seed beads and pass the needle through the 4mm bead added in step 54
58. Pick up 2 seed beads and pass the needle through the same 6mm bead
59. Continue with adding 2 seed beads on the inner edge and 3 seed beads on the outer edge
with a 4mm bead in between, until you have added 12 4mm beads in total. Your thread should
be coming out towards the inner side of the pendant
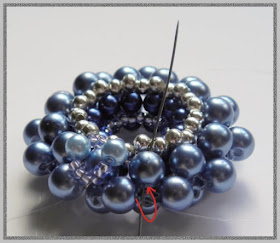
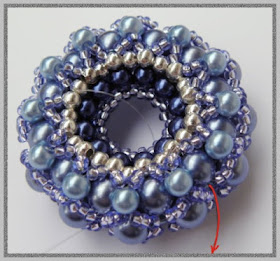
60. Pick up 2 x seed beads and pass the needle through the 4mm bead added in step 47
61. Pick up 3 x seed beads and pass the needle through the 6mm beads the thread was coming
out at the beginning of the previous step
out at the beginning of the previous step
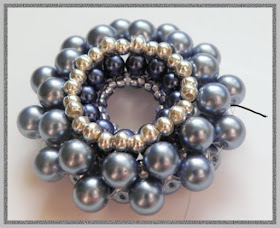
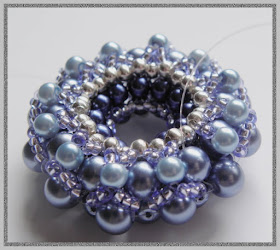
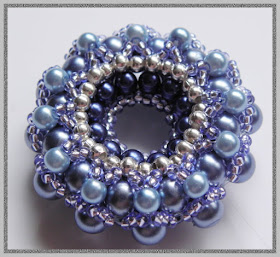
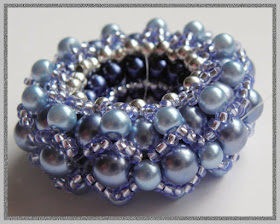
62. Your beadwork should look like this at this stage:
63. Repeat steps 47-61 on the other side of the pendant. At the end pass the needle through the
beads so the thread will be coming out towards the outer edge
64. Pass the needle through the nearest 6mm beads on the outer edge, no matter whether
it is left or right
65. Pick up 1 x 4mm bead (colour 2 - or any other colour you wish) and pass the needle
through the nearest 6mm bead on the outer edge
66. Repeat step 65 until you have added 12 4mm beads
67. End the threads, secure the knots and enjoy your new beaded donut! :)
CONGRATULATIONS! :)
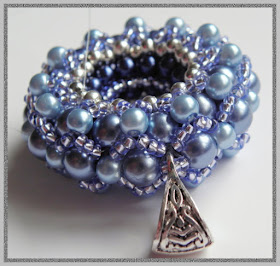
HINT: If you want to make a pendant, you can skip one 4mm bead in step 66, and add a bail,
a jump ring or anything you wish instead. I like adding seed beads and metal bails which
looks like this:
You are free to use that idea too, only then you should pass through all the 4mm and 6mm
beads on the outer edge a few times, to make sure that the bail is well secured.
Many kinds of beads would work for the pendant, as long as their size is around 4mm, 6mm
and so on. So you can use wax pearls, fire polished beads and any others, as long as they are
more or less round. You can also adjust the number of seed beads, if you wish to use beads
size 15 for example. I wouldn’t suggest using seed beads bigger than size 10 though.
And one more thing for the end... I hope you enjoyed making this pendant and the tutorial
was helpful for you. I will be happy to receive some feedback, and if you have any suggestions
what should be changed in this tutorial, feel free to contact me. If you are going to show this
pendant on your blog or any other website, please give me a credit for being the author of this
pattern.
Happy beading!
Author: Justyna Szlęzak, Eridhan Creations
eridhan.blogspot.com
Unauthorized copying and/ or commercial use prohibited
Copyright by Justyna Szlęzak 2012
--------------------------------------------------------------------------------
The printer friendly pdf file with the whole instruction is available here on Craftsy and Etsy.
Disclaimer: Please do not sell the items you made from the free tutorials. If you want to sell the items, please purchase the pdf files I offer on Craftsy and Etsy - that gives you the right for selling your creations. Thank you.







Świetne!
ReplyDeleteThis comment has been removed by a blog administrator.
ReplyDeletePlease do not publish links in the comments unless they refer to the entry content. Thank you.
DeleteThanks a great deal for sharing! God bless and may the muse always be with you!
ReplyDeleteI just made this donut! It looks beautiful! Your instructions were very easy to follow, I did not have any difficulty at all! But the beads I used turned out to be a bit heavy, so it won't be ideal to use the donut as a pendant, as it weighs quite a lot. So I was wondering if you could give me any ideas for the use of the donut other than as a pendant?
ReplyDeleteThank you!
Thank you, I'm happy you liked the pattern. But I'm not sure if it can work as anything else but pendant... but you know, I'm crazy about pendants, so heavy or not, I still would wear it. ;)
Delete